The BIG one


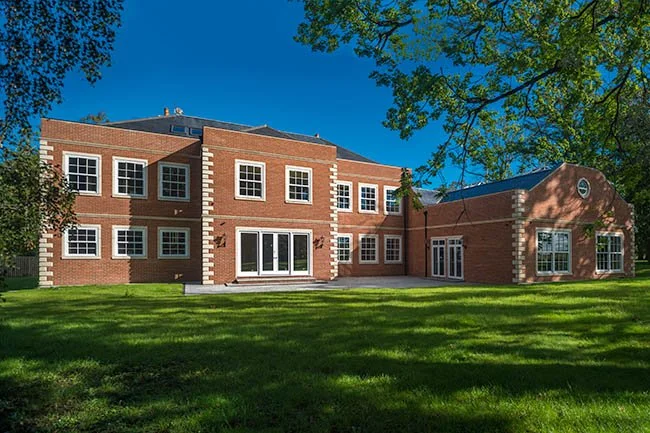


Late summer brings a rush of properties waiting to be shot. the summer holidays end, people get back to work, and the weather tends to remain pretty stable for a month or so. it’s the peak time for this type of work, and September brought 34 separate shoots to contend with. I’ve worked out that 50 is probably my limit in terms of being able to handle the travelling, shooting, and post-prod. Fifty regular real-estate shoots would take up about 200 hours of work altogether. Alternatively, I could land 15 of these beauties, and have a much less stressful life all-round. This mansion is situated in the Tranwell Woods area of Morpeth in Northumberland – an area popular with the new-money wealthy folk such as footballers. many NUFC players have their homes here. The house, set in 2 acres of grounds had been on the market for quite some time, and needed some updated shots to get the market interest reinvigorated. I selected a lovely summers day in September to cover all aspects of the property. The owner greeted me at the front door, I parked the car in the marble-floored garage, and started getting set up. It was a biggie!
Externals first. the front of the house was facing dead North, so it never really got any direct sunshine. The sun was slowly moving away round to the back, so I got this done first, before the fascia was totally in strong shade – classic ground level viewpoints using my 24mm PC-E and a circular polariser to extract as much from the D3 files as I could. I refrained from using my D800 with its huge files as I didn’t want to spend hours processing them. Overkill is rife in this industry, and if I could find a camera with glorious 16 bit colour depth, and a wide dynamic range sensor at 6 megapixels, I’d sell everything for it. Nobody uses bigger files than 3000 x 2000 pixels in this game. Anyway, I needed to expose carefully to make sure I captured as much as I coulkd in the shadows and highlights. There was some careful tweaking in Lightroom and Photoshop to get as much middle ground as i could get. The trees and lamposts were a bit of a pain, but there was nothing I could do about them. The trees were positioned to provide privacy, but they obscured the view completely. This is a time I could have used a wider PC lens, and this week Nikon have leaked details about a 19mm PC-E lens coming in early 2017. My life will be much, much easier with this one bit of long-overdue equipment. More on that when details area revealed officially.
I shot the back, which was in full sunlight, then got out the elevated pole for some different viewpoints. The trees were providing an unwelcome obstruction again, but I got some decent shots. After about an hour of shooting outside, it was time to tackle the huge interior spaces.
My prep had included a previsualisation of the various spaces – provided by previous shots. This gave me an idea on how to light some of the more difficult areas, and show the flow of the property. I’d received a basic brief about how to present things – which basically said that I needed to convey the sheer size of many of the internal features. When I looked around, it was clear that the trick was to avoid the Ultra wide angles usually employed in property shots, and revert to classic architectural photography. The staircase was a prime example. Previous shots tried to show the entire space, which resulted in the staircase looking fairly diminutive due to an exaggerated perspective. I had to utilise the 24mm PC-E again to keep things in scale, focus on the feature, and keep the vertical lines straight. The area was huge, so I lit it using a 500J Bowens head and 7ft reflector. There were five Nikon Speedlight units placed at various points behind the stairs, on the first floor landing, and in the corridors off to the rear. Pretty much a one-shot take, with just a couple of highlight flashes on the stairs.
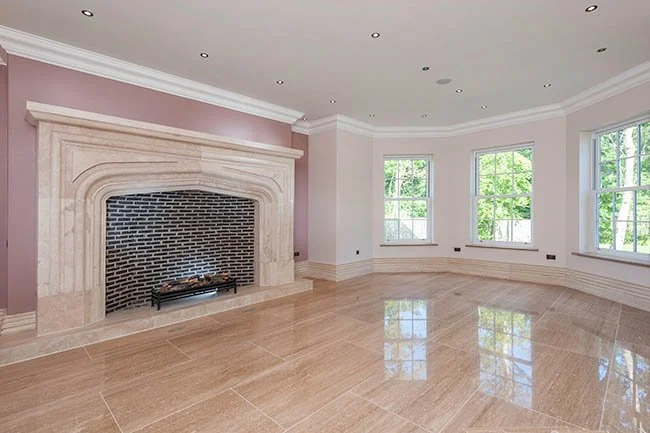
The various reception rooms were shot with the 14-24mm f2.8 Nikon lens – it’s a mammoth bit of kit, and is pretty much permanently attached to my trusty old D3 nowadays. Usual techniques were applied in these rooms – measure the exposure coming in from outside – add a stop & a half to lighten it up, bounce enough flash into the space to illuminate the interior sufficiently, measure the interior ambient light and shoot 3 bracketed frames for blending in later, then add a few highlight flashes – seen here behind the fire gate, atop the mantelpiece, and at the edges of the fireplace. I had to use full power on the key light, as these were big old rooms.
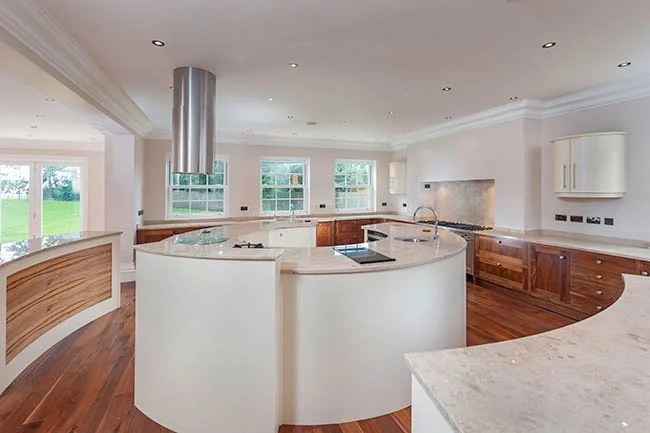
The kitchen was a technical nightmare. It was a vast space full of standalone features with strong sunlight along one edge, and almost total darkness along the other. It blended in to a large, open plan dining room space with direct sunlight blasting in. The normal viewpoint – shot at eye level across the whole space, was a disaster. I had to look at different methods of shooting the space, and decide upon capturing each element of the kitchen separately with it’s own viewpoint and lighting. First I got the cooker, and prep areas by directing 3 different flashes in from the right hand side, then adding some highlights, and blending everything with a few exposures using natural light the-birches-kitchen-oven-area
The island in the middle of the kitchen was the difficult thing to shoot. I did an overall shot of the whole space, but it lacks any shape or structure to be honest. It’s a good stock-shot for the website, but there simply wasn’t a viewpoint where I could convey the feature properly. It was a huge pain to light as well, as there is nowhere to actually hide flashes. It took a whole bunch of separate exposures, and selective masking in Photoshop to put the image together.
When I looked at the other side of the island, it became clear that I needed to elevate myself. The camera was put on top of the workbench, with the 24mm PC-E lens fitted. The vertical lines were straightened, and the lens shifted down to it’s maximum limit to get the entire island in. The lights were positioned, and a bunch of exposures shot, including some ambient frames. Way better results.
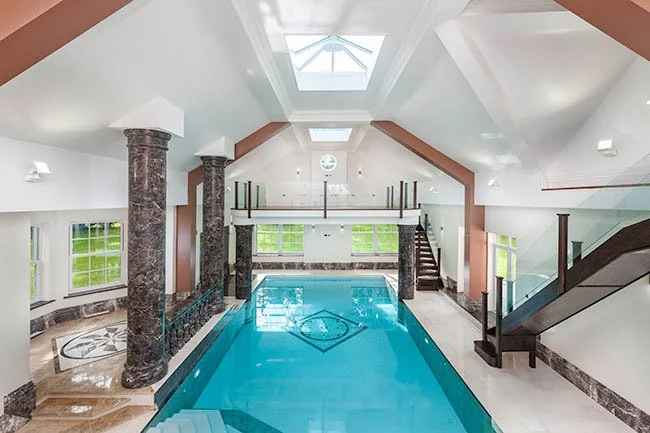
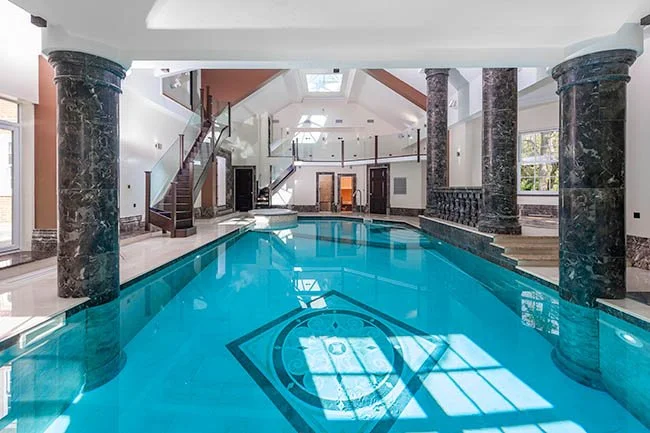
After shooting more of the reception rooms, and dining areas, it was time for the biggest room in the house – the gigantic marbled swimming pool, complete with sauna, hot tub, and two mezzanine areas – gym, and viewing platform. I could have made this way more complicated than it needed to be, so I let the natural light do most of the hard work. An ambient test shot proved to be perfectly acceptable without any additional lighting, but I knew it could be improved. I mounted a Bowens head onto a tall light stand and pointed it skywards, behind the camera so that it bounced off the white roof space. This immediately lifted the whole space. Next, it was simply a case of adding lights in layers to each area of the pool that needed it – the mosaic area next to the big pillars, the mezzanine opposite, and in the sauna, under the steps, and any other nook that I could determine. The flash head had to be connected to a Travelpak battery rather than the mains electricity obviously, and the final result shows the size of the space effectively. Adding light creates depth, and dimension to any large interior space.
Cinema room on the top floor next. This floor was being used as temporary living accommodation by the owner, so i couldn’t shoot the whole space. It’s effectively an entire suite in itself, with a kitchen, huge bathroom, and massive bedroom with living space that would swamp my entire house. The room was dark by default, so I had to show it as such. natural light was the key again, with a few hints of flash to simulate the output of the spots that were dotted around the room. Wonderful thing this sun.
Bedrooms now. There were five rooms situated on the first floor – all off from the circular landing. Each had it’s own style, complete with more Marble than I’d ever seen outside ancient Rome. Most of the rooms were huge, some with open-plan aspects, and some with separate bathrooms. The spec in the bathrooms was second to none – all had special waterproof TV screens in the shower (?????), and feature sinks, baths, and shower heads. The empty bedrooms were pretty simple to photograph, but each of the bathrooms had their own foibles which demanded constant thought and preparation to avoid reflections from mirrors & glass. The walk-in shower below needed several flash hits behind the glass to minimize the reflection of the camera and tripod, then a good deal of retouching to get rid of the reflections which remained. Should have remembered to pack my big black roll of cloth to hang from the doorway. I stick a hole in it, push the lens through, and hey-presto – reflections eliminated.
The rest of the bathrooms just needed the usual treatment as described earlier – general flash exposure, several highlight flashes, and a few ambient shots to blend in. Note the amount of marble throughout.
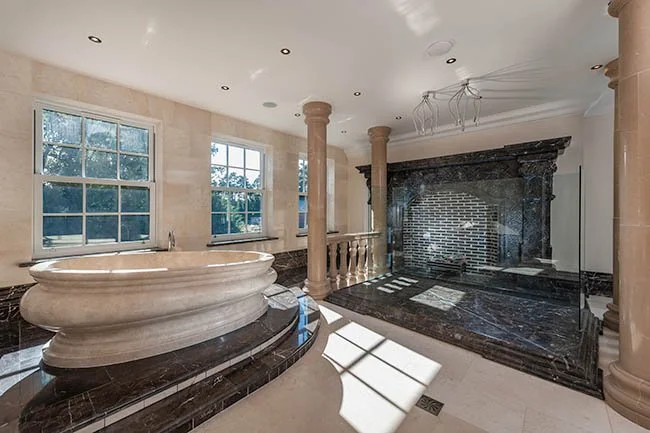
Probably the most impressive shower was this one – sections of curved, pink marble stacked into a cut-out cylinder with a huge shower head directly above. I lit this in a few stages, taking care not to create too many highlights on the shiny surface.
I started the shoot at 10am, and finished at around 5pm, with raw files for about 50 final images. I wanted to get the post-prod done straight away, so worked into the night to get them finished and uploaded. I might revisit some of the images and tweak the lighting a bit in months to come, but I’m pretty pleased with the results. The owner certainly was. I’m planning to re-visit soon to shoot a classic twilight image, which will be a composite of about 60 frames shot in half an hour after sunset. That’ll be a post in itself.
Anyway, the house is still on sale for a cool £3.95m, and was featured in the press. The owner is actually a properly nice geezer who is waiting to sell this gaff so he can pay to build an even bigger house on a neighbouring plot. That’s a couple of years away, but hopefully I’ll be around to see it built and shot eh?