Mid layer lookbook shoot
Shooting sets in the studio was great fun. My working life is currently based around shooting luxury property in “real-estate” stylee, with speed and cost being the main issues for all my clients. This type of shooting is a different matter – I would pick up any gear from the client, take it back to the studio, and follow a rough brief to produce rich imagery for websites/brochures etc. The following frames were shot on one particular day for those purposes.
First things first – the styling. I could have done this myself, but in the hands of a skilled clothes and VM stylist, things just get better and easier. If you’ve tried to get a shirt inside a jumper and fold it without making it look like a dogs dinner, then you’ll know what I mean. Use a pro.
The Wellington shot was done by turning a tabletop on it’s side, getting out into the autumn and collecting leaves, arranging them accordingly (not as easy as it sounds actually), and placing the boots in position. Lighting was relatively simple – two 1500J flash heads fitted with softboxes at either end of the set to provide even illumination. This was being used as a title graphic for an article somewhere within a website, so had to be a specific height and width. This had to be taken into consideration before setting up.


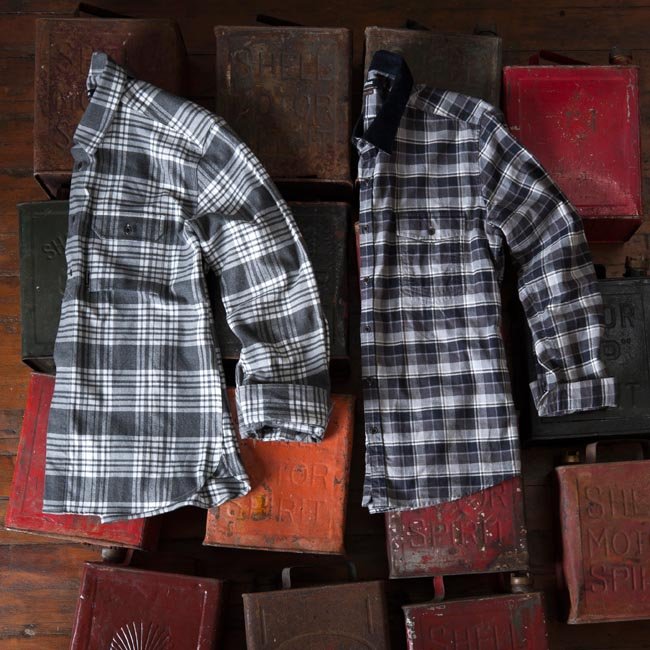
Next was the hession-backed set made by clamping some sack cloth from a roll to the backboard, and putting screws in. The shirts were hung so that the features were visible – cuffs rolled back, and elbow patches brought to the front. Lighting was directional, with a single flash head to the left of shot. You can see the angle of illumination by looking at the shadows cast.
Sumptuous close ups next. I borrowed some old wooden wine crates, and the stylist folded and inserted the knitwear into the hollow. Lighting was again directional, but with a white reflector bouncing some light back in to the shadows. the more directional the light, the greater the texture that can be shown. This shot really shows off the feel of the materials.
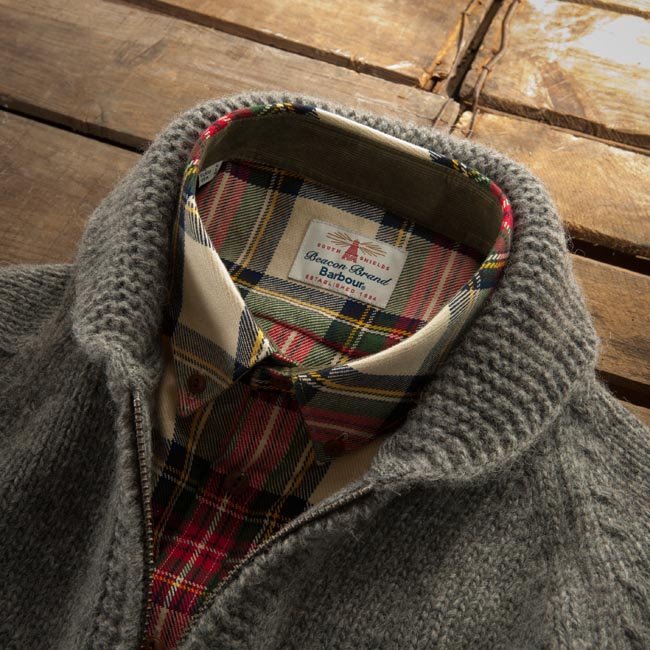
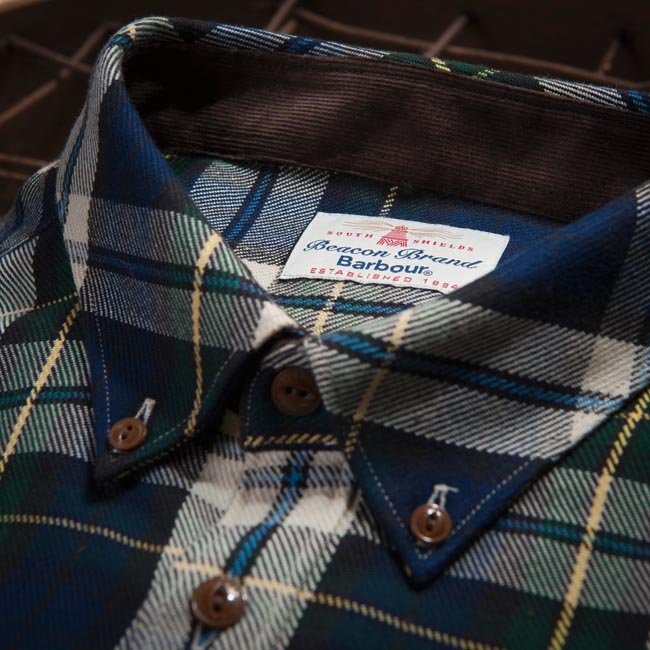
The collar images were set up, and backlit. You can see the highlighted areas on the top right of the crate. Lighting closely from this angle, again gives the garment texture, and you can draw attention to certain parts of the clothing by letting other bits fall into shadow. A white reflector was used again to just throw some light back into the shadow areas.
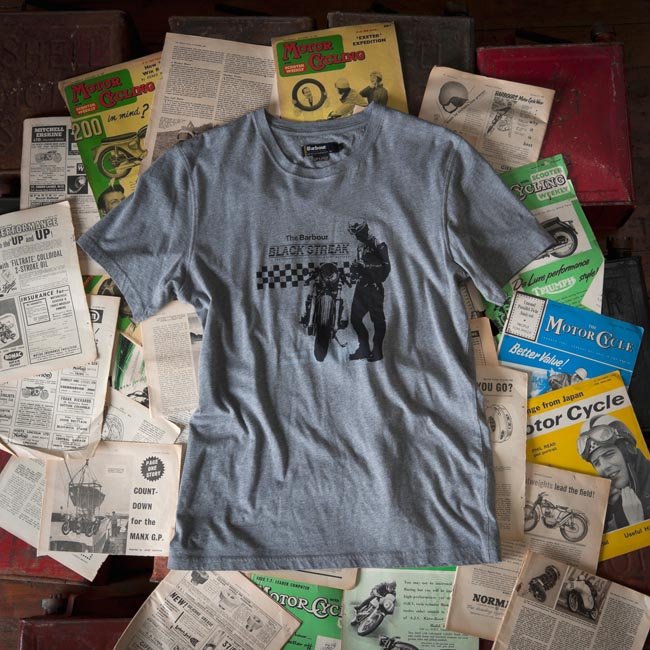
Now the stylist got round to the flat shots. I referred to this style of shooting as “superflat”, as it was lit using my style of a single, hard light source – a flash head situated at 30 degrees elevation at a distance of around 10 feet, with just a reflector fitted. This gave even illumination across the frame, hard shadows, and rich colours due to the contrast created by the hard light. I used this lighting on thousands of garments over the years. It works for all types of things that need a demonstrative view of texture – not only clothes. It’s the reason that pro landscape photographers shoot when the sun is low in the sky – it skims across the ground, showing undulations and adds contrast to what could be a boring subject.
It’s essential to either possess, or have access to lots of props in a product studio. Having backgrounds to show context or provide contrast with primary colours is important. This image wouldn’t be the same on a clinical white surface. We built a platform of old oil cans that had been painted various shades of red and brown to keep the image rich.
I always loved doing these lookbook shoots in the comfort of the studio, with a decent budget and the time and resources to spend on making the stuff look great. How I wish I had a day to shoot a 5 bedroomed house!